Showing posts with label repurposing. Show all posts

Friday, May 29, 2015

Summer Shorts Weather - Finally

Our weather is crazy. It was barely in the 50's last week and then this week it's hot and humid for a couple days, then nice (70's) for a couple and now we're expecting 90 tomorrow. I thought Elena was pretty well set for shorts this summer, but she has gotten so tall that they are actually too short. I'm tired of her little bum hanging out when she's lolling around on the floor, grass, couch ....


I traced a pattern from a Japanese sewing book last fall/winter and photocopied the instructions because I had borrowed it from the library. Somehow, I don't have the title of the book on those pages. All I can tell you is that these shorts are "h" and are called Pants with Turned-Up Hems. I liked that they had cute pockets on the back and a yoke. I dug through the upcycle stash and found a nice maternity skirt that hadn't been worn much at all but would be perfect for a muslin that would hopefully be wearable . It had great topstitching and just enough fabric to work with, so off I went.


I sewed them up with no modifications and tried them on her. Yuck. Not good at all. The front rise was ridiculously high and pouchy on her and the side seams bowed out like jodpurs. (Isn't that what those crazy riding pants are called?) The back was good, and I liked the longer length so I cut the waistband off (it's a whole separate piece) and cut the yoke down in a curve on the front. I used my favorite Titchy Threads Twisted Trousers as a guide. I also borrowed the knit waistband from the Twisted Trousers pattern, and ran back to the machine. Oh, and I straightened out that side seam while I was there.


Now they are very comfy. The fabric is lightweight making these perfect for hot days. I love that I could take advantage of the cool top-stitching and the deep hems. We can even roll these up for walking along the beach.

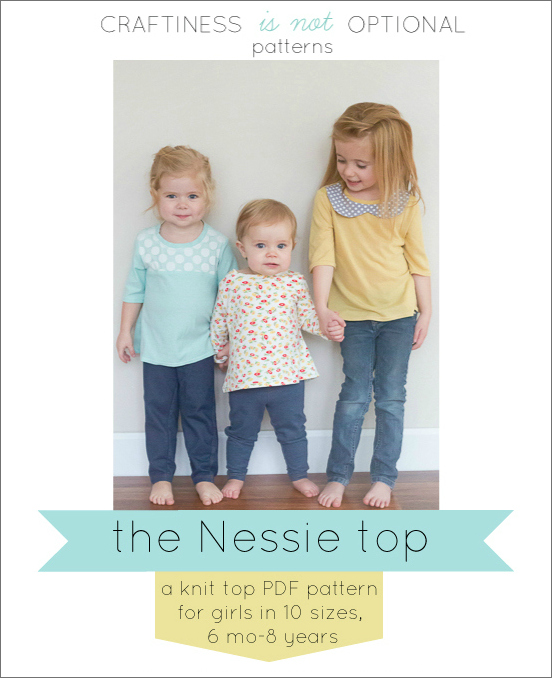
This shirt is one I made for her last year and blogged about here. It is my own reverse applique design on the yoke of a CINO Nessie Top. This may have been the one that started my love affair with the Nessie.

Lately, Elena wants to take a selfie with me during each photoshoot. Guess that can serve as inspiration to dress myself decently. (I'm wearing a Plantain Tee, my TNT t-shirt pattern.)


I don't think I'll bother with this pattern again, since I had to make so many changes in the end. Instead, I'm going to make some more Twisted Trousers shorts so stay tuned for that. I have an idea to change them up just a bit. Thanks for reading.

Monday, May 18, 2015

Izzy Top - A Favorite Free Pattern from Climbing the Willow


I loved my first Izzy Top made last year, but it was time for a new one. You can find the pattern HERE on the Climbing the Willow website. I traced the 3T and went to look through the stash.(The stash has grown recently due to the generosity of a woman whose children I babysat as a teenager. Vintage fabric and patterns galore. Yay!)

Anyway...


I've been playing around with mixing knits with wovens for tops lately. I like the idea of the knit top portion because then there is no need for linings or closures, and I like the wovens in summer a lot too because I find them to be lighter and breezier than most knits. This top portion was made from the above mentioned recently inherited supply of 1970's green terry cloth. It's pretty lightweight and decently stretchy, with a cool texture. I was a child in the 70's so it reminds me of things I wore. It wasn't stretchy enough to use for the neckband though so I used a scrap of cotton Lycra in purple. The only pattern modification was to remove the center back seam allowance and cut the back piece on the fold as well.


 The skirt portion is made from a thrift store scarf - with fringe! It cost only 50 cents and was just big enough. It was meant to be, right? This skirt is a 3T in width and about a 4 length, plus the fringe, in case you're thinking of checking your thrift store now. (I don't think it would work for any size above 4T.) It is so light, soft, and bohemian looking and I just adore it. Elena loves swinging the fringe around and twirling. I love making something out of nothing. I really get such a kick out of that.

I have come to realize that my favorite part of "sewing" is actually the designing and planning and choosing materials. The actual sewing is just a necessity, but not the best part.


We had a lovely day out at a nearby park. We stopped at the garden center and farmer's market on the way home. Then we worked on planting some of the garden since rain threatens for the next few days. There is so much more to do. We've only planted onions, potatoes, and a fresh strawberry bed so far. We've gone a few years without strawberries, but I love being able to feed my family organic berries so I'm bringing them back. We have red raspberries already, but I'm adding in blackberries this year too. We're already eating our well-established asparagus. Every day at this point, but we still need to plant sugar snap peas, beans, peppers, and lots of tomatoes. So much more to do in the next week or two.

Wednesday, May 13, 2015

Upcycled & Hacked Aster Cardigan


My 15 year old son recently went through his drawers and contributed to my upcycle stash with a nice thermal knit long sleeved crew neck tee. And although it's been really warm lately, we've had 2 days of 50 degrees thrown in. I wanted to make a quick Aster Cardigan for layering and I wanted to keep it neutral to go with lots of things, but not be white.This oatmeal color is nice.


The hack was to lengthen the sleeves, change the shape of the bottom hem to reuse the cool shirt-tail hem the tee had, and change the closure. I interfaced some woven floral cotton to make a strong tab, and  and sewed it to one side and added a snap to the other side. Easy for Elena to do and adds some needed femininity to a boyish tee.


One cool thing about this quick project is that I finally tried my walking foot and it's AWESOME! I'm going to leave it on there a while and experiment a little.

Also new here, are these wide-leg knit capri pants made during Kids Clothes Week and shown on Instagram, but not here. They are also upcycled  from an old tee. The tee had the large rose print on most of the front but the sleeves and back were the lighter leafy print. It makes for some interesting pants. I used the Ananda Pants pattern again in a 2T and shortened them. Super comfy and the short length gives an Asian feel to the outfit. (The tunic was previously posted here.)


I get such a thrill from making clothes for Elena out of nothing. I may or may not have initially paid for that thermal tee. I can't remember at this point if I bought it or if it was a gift to Andrew, but it will live on with Elena. The rose tee had been my mom's so there was no cost there. The only real costs here were my time (the most valuable), some thread, and a snap. (Though the tunic is made from fabric from Girl Charlee and a bit of a thrifted lace tee. And a scrap of that tunic fabric makes up the pant's yoga waistband.)

I just love that I can get away with this recycling for now for her. It's so easy to upcycle items when the new item is a small size. That is much harder for the 4 adult sized people that make up the rest of the family. I'll keep doing it as long as I can just because.


Saturday, May 2, 2015

The Ready for Anything Outfit

I was super productive this past Kids Clothes Week and have more to brag blog about. Actually, these aren't anything very special, but good grief, they are comfy and I want some.


The top is my go-to CINO Nessie Top made from a scrap of floral interlock Doodles from Joann's a couple years ago and a white box tee cleaned out of my oldest daughter's room recently. That is the quickest way to make a tee. I cut the neckband off and reused it and reused the sleeve hems too. So fast.


The pants are shortened Ananda Pants, a pattern from Chopstix that was part of the SewFab Bundle in Fall 2013. I made a 2T and shortened them a lot, partly because that's all the fabric I had. Last year I had cut a maxi skirt down to knee length for Olivia and had this piece left. It's super soft and drapey rayon spandex. I didn't hem them because they are just for play and it's so thin I didn't think it would be any fun to do.

And now Elena is ready for anything a beautiful spring day can throw at her.

Long walks on the fishing pier.


Sliding.


Swinging.


Jumping, running and rolling down hills.


Ignoring her photo-bombing cousin.


Keeping half an eye on that cutie cousin creeeeping up on you again, trying to steel your spotlight.


Bring it on spring. We're ready for anything.
(And it cost us NOTHING but an hour of my time and some thread.)

Tuesday, April 28, 2015

Friends Part 2 - The One With the Re-do

I'm asking for a re-do. My first Friends look for Alida's Sew the Show was boring. I must have been PMSing and feeling old and incapable of having fun. So here is my new Phoebe look instead (complete with my rendition of Smelly Cat).


After Becca DuVal wrote in the Facebook group that she was looking for a slip dress pattern, I thought "Oh, that'll look great on her. She's young and cute and slim. I can't pull that off." Then I watched Oprah's Spirit Class yesterday (Sunday's epidsode with Christiane Northrup) and had an ah-ha moment. She said, "Belief trumps genes." So if I believe I'm still young and pretty enough, I will be. And my genes must be pretty good too because I have a 3 year old. I read somewhere recently, that having a baby in your 40's makes it very likely that I'll live into my 90's. There is a correlation between my reproductive system being young enough to do that at 42 and the age of all my cells. Elena will be 4 this summer and is keeping me young.

Anyway, the dress here is made using an old pattern from 1996. I forgot I had it, but am so glad I did. I used a thrifted rayon dress to make this, which is essentially a muslin because it felt very experimental. I didn't have enough fabric to make it as long as I would have liked. I also didn't have enough to do the facings the pattern called for, so I did bias tape instead. All in all, it still turned out pretty good and I may even make another. It feels so light and comfortable it's amazing.


I feel quite naked without my granny chic sweater on, but I  wanted to show it on it's own at least once.


So now that I'm feeling young again, we'll be switching to the Golden Girls for next month!?!? Are you screwing with my head Alida? That is another awesome show and will be perfect for summer coming up so I'm excited. Thanks for stopping by.

Tuesday, February 17, 2015

PRP February: Mademoiselle Muscle Tee Again


We loved our first Mademoiselle Muscle Tee outfit so much, we needed to make another one for Project Run & Play. Needing a smaller size than Living with Punks offered, I used the Tinley Tee this time by Get Your Crap Together Designs. It has a nice straight design with lots of sleeve options. I kept with the wider neckband of the Mademoiselle but used the flutter sleeves of the Tinley. The fabric is an old receiving blanket in great condition.


As per my usual way of thinking I'm so smart, I changed the flutter sleeve slightly. Instead of having the sleeves wrap all the way to the bottom of the arm, I gathered them more and stopped them short of the bottom of the armhole. I used a strip of knit to finish the armhole edges. This shortening up made them fuller, but I don't know if that was a good thing. That along with hemming them, makes them stand out a bit too much. Next time, I'll put them down further and not hem the edges so they hang softer. There will definitely be a next time too. I love a simple tee like this for summer. Cool and breezy like a muscle tee with just a bit of sun protection for the shoulders.


And yes, we needed another skirt to wear with it. This too is a refashion. Originally a vintage sheet, I had made myself a skirt with this floral border print. That was a few summers ago so it was already in the refashion pile since last summer. It is such a pretty print and color palette.


I added some bits of lace and eyelet to make a shabby chic look. You can't get more feminine or springy. 


Thank you so much for stopping by my little blog. And thank you to the ladies of Project Run & Play and Living with Punks for this fun challenge. 


Friday, February 6, 2015

KCW Caroline Party Dress from a Valance


Last summer I found a window valance at the thrift store. It was made of such adorable fabric and it was half price day so I took it home. I finally put it to use during this upcycle themed Kids Clothes Week.


This is what I had to work with. It is only 16.5 inches high and the gingham was so small it was useless. Fortunately for me, I had some of the very same gingham in my stash already from some pillows I made about 15 years ago. I believe these are Waverly prints and they might be called something to do with "Country Fair".


Isn't that fabric adorable? There wouldn't have been enough without the gingham insertion on the front. As it is, the skirt is about 8" less in width than it should be, but it's still full enough.


I made one other change that I am kicking myself for. It was snowing like crazy and the big kids were home again. I didn't feel like trying to drive to Walmart, my nearest source for a zipper. I thought it would be no big deal to change it to a button placket. The sewing was the easy part. The button holes proved to be impossible however. After ripping out 4 attempts and stomping my feet like a child, I gave up. I ordered snaps online and will finish this up next week when they arrive.

Wednesday, November 12, 2014

Art Smocks

Elena's preschool teacher noticed that all (well nearly all) of her clothes are handmade and asked me if I sew. She was looking to have someone make some art and water play smocks. And since I can, and since I have to do service hours anyway, I wanted to help. The teacher had a good idea of what she wanted and described it pretty well but didn't have a photo to show me. I looked through Pinterest to get some more ideas, read a few tutorials, and merged a few ideas to come up with this smock.

workpraysew.com

For materials I used leftover scraps of Babyville PUL that I bought at Joann's to make waterproof training pants more than a year ago. I only made 4 pairs so there was a lot left in 3 different prints. I also used a plain men's large t-shirt. I love when I can use stash only to make a project and it costs me ZERO dollars and uses up stuff that had no other purpose.

You can see that the front is bib shaped but the back is only half as long. There are straps connecting the front and back under the arms. I thought that might make it harder for the kids to do independently but the teacher said it was good because they would get more practice at dressing themselves. All that Montessori practical life stuff that is so good.

workpraysew.com

workpraysew.com

And then because this was a lot of pink, I made another more boyish one. Again, I was working with what I had and trying not to worry about gender too much because 3 year olds don't worry about that much yet. So the front is an outer layer of PUL with another old t-shirt to line it and for the back.

workpraysew.com
Cleveland Browns colors!
I don't have photos of the process (because I work in my dark, scary basement and don't want to run upstairs every 3 minutes to photograph each step) but I can tell you how I did it.

First, I used a basic cap sleeved t-shirt pattern as a base. I went with Imagine Gnats Tumble Tee but there are other options you may already own. I cut off the bottom of the armscye to blend it into a sloping line down the side. I rounded the corners on the front piece as well. I cut one each from the t-shirt and the PUL. 

Second, I used the same pattern piece for the back but shortened it to fall halfway down the back. I cut one of those from the t-shirt using the original hem at the bottom and cutting it about 3/8" wider so I could hem the long sides.

I also trimmed the neck band off the t-shirt and set that aside.

I trimmed two 4" pieces of the bottom hem off the t-shirt to use for the side straps. I made sure not to cut into the hem's stitching so it wouldn't unravel.

Start with the 2 front pieces and place them right sides together. If you use pins you should place them only within the seam allowance so you put as few holes into your PUL as possible. Sandwich your strap pieces between the layers about 8" down from the top making sure that the right side will be showing when turned over. Sew all the way down one side, around the bottom and back up the other side. Trim your seam allowance and turn right side out. You will want to topstitch all the way around now. Use your fingers to roll the t-shirt lining to the back as you go. 

Now take your back piece and press under 3/8" on each side. Stitch in place.

Attach the front to the back at the shoulder seams. Finger press the seam allowance toward the back and topstitch in place. Then carefully trim any excess seam allowance off. 

Check to see if your neck opening is big enough because the PUL on the front will render the front stretchless. I cut my neck opening just a little bigger, tried it on Elena, and then trimmed a little more in case some of the kids at school have extra large noggins. Measure that opening and then multiply by 80%. Add 1/2" for seam allowance. Take your salvaged neck band and cut it down to the measurement. Open it up to sew the short ends to form a circle. Fold it back in to hide your seam allowance. Divide your neckband and t-shirt into quarters and pin together. You may want to baste the 2 front layers together first to make things easier. Stretch your neckband evenly between the pins and sew with a stretch stitch. Trim the seam allowance. I did not topstitch.

The last thing to do is attach the side straps to the back piece  to match the front and you are done. I used a zig zag stitch and went over it few times. Easy as pie. Please just ask if you have any questions. I hope I explained it clearly enough.