Showing posts with label embroidery. Show all posts

Monday, June 19, 2017

An Embroidered Bag & A New Clutch


Olivia and I have been collaborating on a new bag for her for some months now. She designed it entirely herself and drew a pattern. She went so far as to create the bag out of newspaper first to see if it was the right size. We headed to Joann Fabrics with some idea of what we needed and came out with this gorgeous sage colored brocade velvet and some purple cotton to line it with.

Then she set to work embellishing it with embroidery. She has a great organic work method when it comes to art. I enjoyed watching the work evolve as she chose one color after another and played around with stitch variations. The more work she put into it, the more scared I became of ruining it when it came time to sew it all together.


She wound up sewing most of the lining with only a little help from me. That way she could put pockets exactly how she thought would be best. In the end, she has only one regret. She wishes the main interior pocket was placed lower. Lesson learned. The water bottle holder on the side was a great addition. She also learned a couple of new sewing skills making that part - basting and gathering the bottom and making the elastic casing at the top. We are building confidence. I think she will want to make some clothes soon.


She didn't want a flap like her old messenger bag, or a full zipper, but she did want some kind of minimal closure so we rummaged through the bins in the basement and found this metal thing and sewed it into the top edge with some blue twill tape. It does the job and is easy to unhook one handed when needed. The handle is wider at the bottom edges to bring a little more closure to the top by rounding out the sides a bit. Turning that thick strap right side out was a 2 person job!! The strap is long enough to wear cross body, but not so long she can't throw it over one shoulder. It also works well riding a bicycle, which she is having to do a lot of this summer since 2 kids and I are now sharing my car.


Anyway, I am so happy that it turned out well and mostly that she is pleased with it too. It is quite a piece of art and I just love that she understands and likes the concept of slow sewing, of taking your time and making something you really love.

I needed a new little bag too. I made a clutch using this tutorial and some linen scraps for the outside and quilting cotton for the inside. It is the perfect size for running little errands and I can even ride my bicycle with it on my wrist too. Yes, I take turns with the bicycle too when needed.


There isn't much originality happening in this bag, but it serves its purpose and is lovely to look at. I did add some extra rows of stitching to the strap, but that's it. It's a solid addition to my summer wardrobe. Also new to my wardrobe, is reading glasses. Ugh. Getting old sucks.


Tuesday, November 1, 2016

My Embroidered Legends Top

I consider myself to be a pretty decent pattern hacker, but the Sew Straight & Gather Legends Top is not something I would ever even try to hack. This is a beautiful pattern worth every penny, and I'm not paid in any way to say that. No free pattern, no affiliate link, nothing folks. I just love an interesting pattern that works like magic.

The biggest thing you need to know before sewing this, actually before cutting this, is that picking a size is going to be critical. Really look at the size guidelines and the finished measurement chart. You will see that there is quite a bit of negative ease since it calls for nice stretchy fabric. However, if you aren't comfortable highlighting your mid-section, you need to be careful. Last time I made this, I felt like it was just a little tighter than I'd like so I sized up this time and am much more comfy in it. The other nice thing about that mid-section is that the front is 2 layers thick so it feels good, it feels like it's hiding something and holding something in.


Another cool thing about the front being 2 layers thick, is that it makes for a blank canvas for embroidery with a clean lining or a great spot for reverse applique. I opted for a tone on tone embroidery pattern in keeping with my mostly solid but not too boring capsule wardrobe. Burgundy is a big trend this fall. I didn't know that when I ordered this fabric from Girl Charlee this summer, but it's always been one of my favorites so that was lucky.


I always have a hard time taking pictures with my crappy camera, but this color and the light outside were extra difficult today. I still wanted to share my awkward pics with you though because the main reason I blog is to share ideas. Sharing is caring, my kindergartener says.


I know you can't see that stitching at all, so here's another close up.


Monday, October 24, 2016

Embroidered Bimaa & LIV Skirt


Elena needed some gray leggings. That's where it started. I had this scrap of Girl Charlee gray cotton lycra that was the perfect width. It was a few inches longer than necessary and it seemed like a waste to not use it all, so I cut them as long as I could and added rouching to the bottom 3 inches. They turned out great, and then I noticed this aqua cotton spandex print (not available now I see) also from Girl Charlee sitting there and what a good match. 

Elena really digs hoods. She wears them up all the time, even in the house. The LouBee Bimaa is my favorite hooded shirt pattern and I already had it printed out and traced in a size 5. The only change I made was to add an inch to the bottom so I could hem it instead of doing the band.

I know I could cut that fabric and sew that top up in under an hour, but I made myself slow down. I was thinking I love aqua with yellow and maybe I could add some yellow to this top so she would wear it with her "banana pants" too. I'm still trying to get her to like those yellow cords. I already had the perfect shade of yellow embroidery floss so I went to work embellishing with french knots, stem stitches, back stitches...


Have you ever had someone say to you, "I like your top. Kohl's right? I have it in blue." Man, I hate that. I think that one of my goals in making clothes myself is to make them unique. It is hugely important to me. I want styles that you would see in a store, but I want them to be unique. The embellishments are an easy way to do that. 


I used part of a thin yellow t-shirt to line most of the hood. I wanted something lighter weight than the aqua and I wanted to tie the yellow in some more. The yellow is definitely a fun pop of color when the hood is down.

The skirt is the free LIV skirt pattern from Sofilantjes Patterns. I've made several before and love it for how little fabric it uses and how quick it is to sew. You can go really basic or have fun with the pockets and mixing fabrics. I used another yellow t-shirt and scraps of the gray and aqua. So little waste with this outfit. I also love that you don't need elastic for it. The waistband uses just the perfect sized piece of cotton spandex for a really comfy skirt.


I think I'm done sewing for Elena for a while. She will need a dress for Christmas, but nothing else that I'm aware of. I reserve the right to trump minimalism with creativity whenever the need hits. I have a couple pieces for myself that I need to show you as soon as I can get pictures. I'm going to be letting my blog domain name go in mid-November so I'll have to figure out if that messes things up much. The blog name will hopefully just revert back to workpraysew.blogspot.com, I'm assuming. So if you have trouble finding me soon, just add in the blogspot part. The tech-side of blogging is no bueno for me and I'm beyond wanting to learn it I've decided. Have a great week!

Friday, October 7, 2016

Chambray Ansley Tunic with Embroidery


This is my third and final outfit for Elena for this fall. The tunic is a modified Ansley top from Blaverry Patterns. I lowered the neckline half an inch, added a tie-back belt, and put elastic in the sleeves instead of cuffs. I think I changed the hi/low length a little too making it as long as my fabric allowed for. I also lined the bodice pieces so that the embroidery wouldn't be exposed on the back and against her skin. 


The fabric is a speckled chambray from the Imagine Gnats shop. It was great to work with. I would definitely use this again. Rachel is having a meet and greet event at her shop tomorrow that I'd love to go to. I have to drive an hour south of home tomorrow for a swimming meet but I'll still be 3 hours north of her so I guess I won't make it this time.


 The embroidery is my own design. I was pretty proud of myself for not spending hours and hours trying to decide what to do. I just went with the first thought I had and then added on. Very organic. Just letting it happen. (Very unlike the top I've been trying to design for myself and can't decide on.)
And looking at that picture reminds me that I also changed the button placket and hid my buttons on the backside. That was because the bodice felt too wide and this way my embroidery design wouldn't be interrupted.


So I have to also mention the "banana pants" as Elena calls them. She is not fond of them, but I hope they grow on her because they are pretty awesome. The fabric is mustard stretch corduroy from CaliFabrics. The pattern is the LouBee Clothing Hosh pants. Size 3 width, 5 length. No other changes. Plain and simple and oh so soft.


Poor kid really hates this blogging business.


Tuesday, August 25, 2015

Another Nessie Top Hack


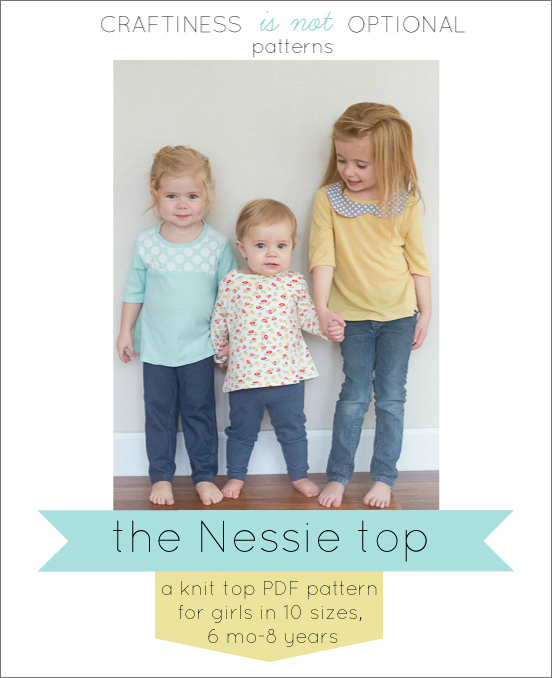
This is my best CINO Nessie Top yet.


An essential element of any capsule wardrobe is a white tee. Last year, I made Elena a really basic long sleeved, crew neck tee. Yawn. I even bored my practical self with that one. It did get worn quite a bit, but my sewing skills and embellishment techniques have grown so this year I wanted to do better.


This sweet knit interlock top (from Joann's) was made by hacking the CINO Nessie top again. In case you are new here, you may want to see my previous Nessie's here. It's a bit of an addiction.

So to make this one, I modified 2 pieces of the pattern and I'm going to show you how to do it too.

I started with the top portion of the front piece which is just a half piece cut on the fold. I traced both halves to get the full front.


Then I marked a diagonal line from the neck/shoulder point to a point on the bodice seam. I was going for a nice looking angle and also avoiding going all the way to the armpit because I didn't want the extra bulk under her arm.


Now that would make the neckline really high and closed in so I drew a new line with a bit of a curve to soften that.


The other change was to the lower half of the front piece. (The pattern comes with the color block options already.) I just added 1-1/2" to the center fold so I could add a box pleat.


I measured the length of the neckline along my two front pieces and the back piece and multiplied by .8 to determine the length of my new neckband. I used the width as given with the pattern piece. I cut out the 3/4 sleeves and my back piece straight off the patterns too. Here are all my pieces. There are 2 of the slanted bodice pieces of course and that neck binding piece is shown folded in half. It's a good idea to mark the center of those bodice pieces along the bottom edge.


To sew it up, I started by serging the 2 shoulder seams. Then I serged on the flat and opened out neckband to the right side because I wanted to do it as a binding instead of a band. I folded the binding to the back side and sewed it down by hand using a herringbone stitch and white DMC perle cotton. Why? Because herringbone stitch is a stretch stitch. Oh you meant "why did you sew it by hand?" Because slow sewing is fun to me and it adds a nice touch. If it's not fun to you, go ahead and sew that sucker down however you wish. A double needle would look nice and retain the stretchiness.


After that, I just overlapped the 2 bodices matching those center marks made earlier and basted them together. I formed the pleat on the lower portion and basted it too. From here on out, it's just the basic pattern except that again I hand stitched the sleeve and bottom hems with that herringbone stitch just to prove to myself that I can do slow. I have had many opportunities to practice patience lately and it's helping me to slow down in other areas as well.


That's all there is to it. I love how the Nessie dips down just a bit in the back. There's just enough curve to look nice but not make it tough to hem.


I really love the swingy shape of the Nessie top. With all of the options Jess provides in the pattern and a little bit of creativity, you can do a million different things it. Have you ever tried it? And no, I have no affiliation with CINO, just sayin' this is my favorite tee pattern. A close second is the GYCT Tinley Tee and I have one of those coming up soon too - with more hand-sewn embellishments. ;-)


Monday, August 17, 2015

Hand Embroidered Skirt & Mini Sutton Blouse for Project Run & Play

I love this month's Project Run & Play challenge for so many reasons. First of all, we're talking about Frances Suzanne picking the challenge and I LOVE those sisters. Their appreciation for vintage/classic pieces with hand work embellishment speaks to me. Second, this month there is the freedom to use any pattern you wish and I'll just say I love my freedom. And third, HAND WORK! I've added embroidery, Alabama Chanin style reverse applique, crochet edges, and beading to pieces before and those are some of my favorite pieces. Ever. There are too many to link to, but if you click the labels "embroidery", "crochet", or "reverse applique" you can see some older pieces.

So what did I make and how did I embellish it? Here is my skirt and blouse for my recently turned 4 year old.


This skirt is from the Simplicity 9889 pattern printed in 1990 but doesn't seem to exist anymore. I made a 2 width based on measurements and a 4 length because if I'm going to put this much hand work into it, it had better fit all year and maybe even next year. But maybe I should have read the instructions better because it allowed for a 3-1/2" hem (!)and mine is only 3/4" (oops). I like the midi length though and think it will be nice and cozy for fall and winter. I left off the suspenders, but followed the pattern otherwise. The yoke provided the perfect frame for some hand embroidery. I free hand drew the flowers on with some thought about keeping things symmetrical. It worked out pretty dang well. I mostly used back stitches and a sort of herringbone stitch. Sort of. It's all very freely done. I like to consult the experts but do my own thing. 

Girls Suspender Skirt Pants Reversible Vest Knit Top Simplicity 9889 … http://t.co/ldgG0uQ8Ap #Etsy #VintagePattern http://t.co/Y9Uync0IWW

The border at the bottom was created by doing long slanted stitches all the way around in light pink and then the opposite direction in green. I tied those together by doing some running stitches in darker pink at the intersections. Then the whole thing felt a little stiff so I ran it through the washer and dryer a couple of times and it softened up nicely. I'm sure it will get even softer with each wash.


The hem embroidery does show on the backside, but not on the yoke. The yoke is self-faced and is handstitched for a clean finish inside. 

The blouse is the recently released Mini Sutton Blouse by True Bias. It is a sweet little top that I'll be making more of over the years. This is one of those patterns where I tend to think the style is simple enough that I could draft it myself, but the real value in buying it comes in learning some nice finishing techniques. I learned some new things with this top and love how clean it is inside and out. It will make a great blank slate for embroidery touches.


I almost forgot to mention fabrics. The skirt is made of more thrift store corduroy just like the pants in my last post. The embroidery is standard embroidery floss. (I found a gallon ziplock bag of various colors at the thrift store this spring.) The blouse is made from a cotton sheet from you guessed it, the thrift store. It doesn't feel like a sheet. It feels like premium quilting cotton. The brown buttons are from my inherited stash. So this outfit comes in at less than $4. Dang girl, how do you do that? 

And now lots of pictures because I simply cannot choose.


This is going to cost me a couple of marshmallows this afternoon and a trip to our Church festival this evening. The joke is on her though because we'd have gone to the festival one way or the other.

If you'd like to keep up with my sewing adventures, please follow me on Bloglovin' or Instagram.