Showing posts with label tops. Show all posts

Thursday, March 2, 2017

A Girlier Lane Raglan

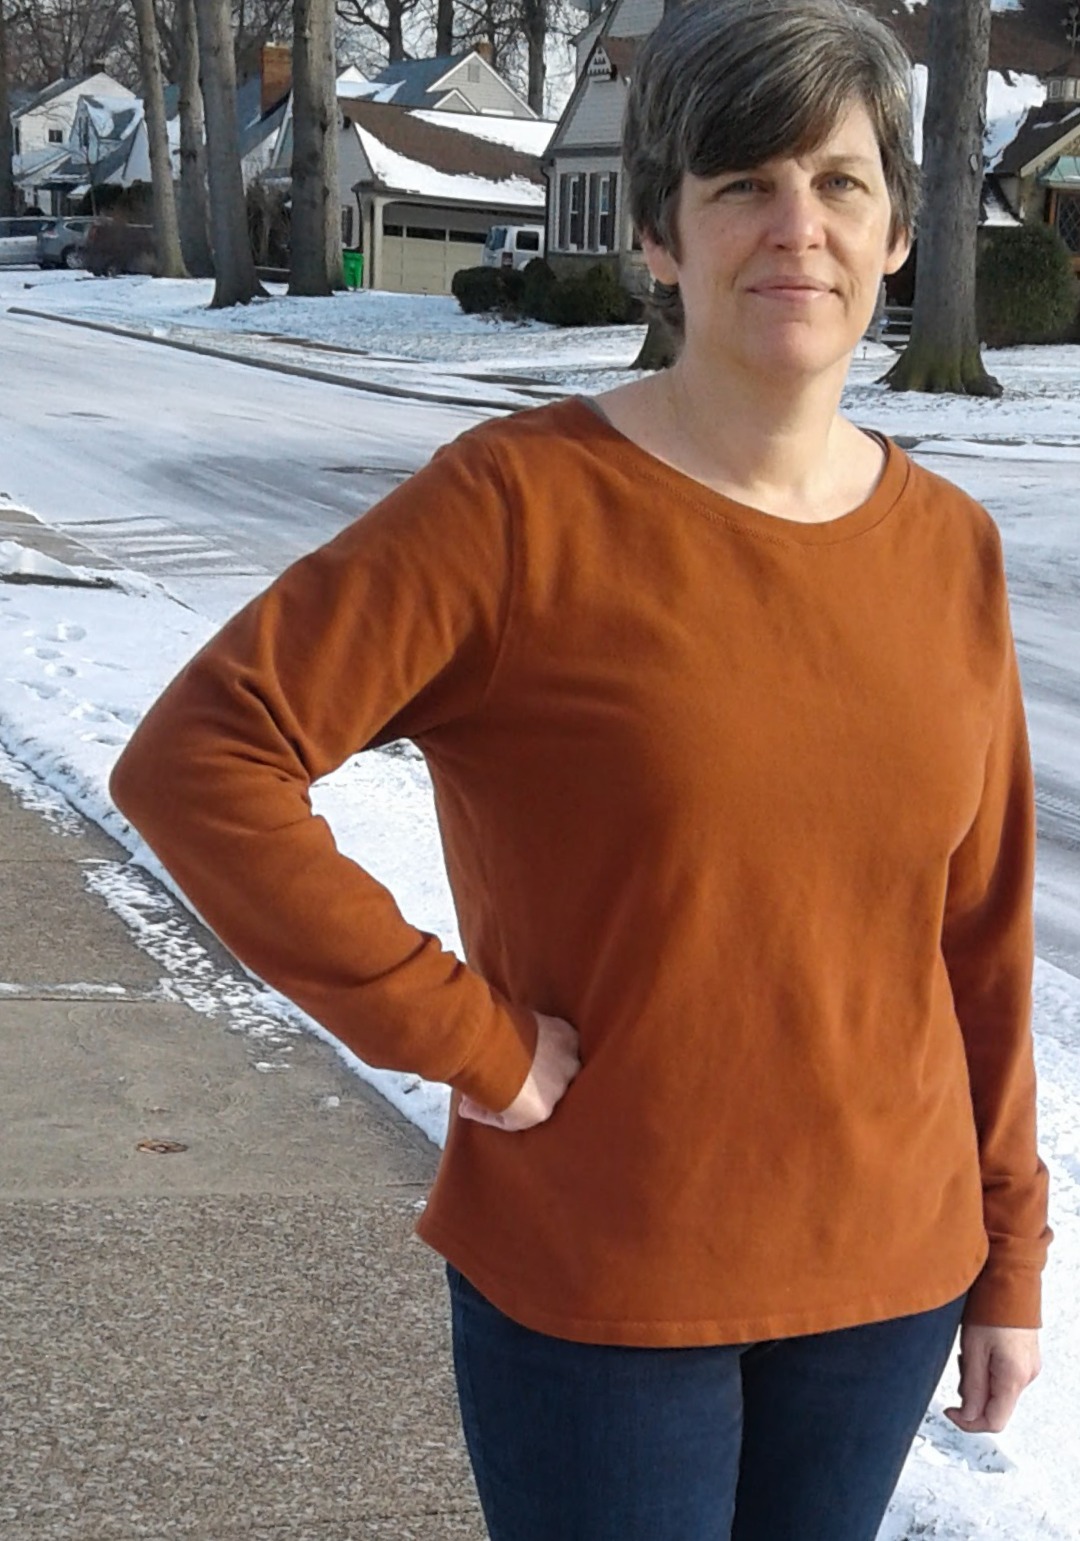
If you look at this picture...


...you might think I made a Lane Raglan. No big deal. Right? We've all made a bazillion Lanes by now. But there are a few things I want to show you about this particular Lane Raglan.

The first is the that I followed some advice I'd never heard before and cut my neckband on the bias. This comes from Melissa at Melly Sews and I think it turned out great. This fabric doesn't have a ton of stretch so I think it was key in getting a nice flat neckband. Check out her post here.

The second thing is the change to the sleeve.


I copied the proportions of a knit top I bought at Kohl's this winter. I cut the sleeves at 6 inches and added 6 inch bells or ruffles or whatever you want to call them, for 3/4 length sleeves overall. There is only 4" of extra width gathered in so they aren't too full.

The third thing is the stitching.


I'm still on the decorative stitching instead of double needle stitching kick. It's just so easy and adds a nice touch. This is stitch #40 on my Singer Quantum Stylus. You know how long that would take me by hand? I do enjoy hand embroidery, but this is so much quicker. Just be sure you have enough thread on both your top thread and bobbin before you start each area because running out in the middle of a line is not attractive. I used this to hem the sleeves and bottom as well and also to topstitch the neckband down.


The last thing I want to talk about is the fit. It's a bit tight in the chest. I'm sure you noticed but were too nice to say anything. So here's my excuse. This top fought me every step of the way. I started out using a completely different pattern for a draped front raglan that I've made in the past. BUT, I just didn't like how it looked in this fabric AND I accidentally attached the front piece inside out! I had serged and lightening bolt stitched so there was no chance of unpicking the whole thing. So I cut it apart and was able to re-cut the front and back pieces and cut entirely new sleeves using the Lane pattern, but the sleeves had to be shorter and I had to use the tiniest seam allowances possible.

So it is a bit snug, but I'm not worried because I gave up dairy for Lent and should be able to drop my winter weight pretty quickly while I suffer through Mexican food sans cheese and no homemade yogurt with homemade granola for breakfast, etc. My chest is one of the first places I lose weight, so that's kind of good news for this top.


What I really like about this top is that it's basically a t-shirt and suits my casual everyday style, but I feel like it can be dressed up a bit too. The fabric is a wool jersey that was nice to work with and feels good - not like wool in other words.


This top makes me feel ready for spring, but I really need some new jeans and pants in general. I think I'll wait and see how much the lower half of me loses though before I shop or sew much more for me.

Tuesday, February 21, 2017

Skip the Double Needle Hem


I made myself this sweatshirt back in November and it took me until now to get some pictures of myself in it. I wear this about once a week because it is so warm and comfy. The fabric is organic french terry from Cali Fabrics last year. They still have it in forest green if you are interested in using great organic fabric that feels good and you can feel good about using.


The pattern used here is the Sofilantjes Otium Sweater again. The only change I made was to round the bottom up at the sides a little. This is the most basic version of the pattern and I realize it's not exactly exciting, so why I am blogging this you may be wondering.


It took me a couple of years to get smart and read my sewing machine manual to learn to properly use my double needle for hemming and topstitching. Now I'm a pro at it, but I still find it annoying. I have to wind an extra bobbin and change the needle. Not that that is so awful, but there is another way. A lot of the decorative stitches on my machine are stretch stitches too. A quick snap on of a different foot and you can be in business. For this sweatshirt, I used matching thread to add subtle details at the seams and the bottom hem. It's such a quick and easy way to add a small detail to a basic without needing another machine. I was thinking of using this technique with that fun rainbow variegated thread for a top for Elena. I think she'd like that.


The snow has melted, spring is not far off. I'm really getting excited about spring/summer sewing ideas so I hope to be back soon with something fun to show you.

Tuesday, November 1, 2016

My Embroidered Legends Top

I consider myself to be a pretty decent pattern hacker, but the Sew Straight & Gather Legends Top is not something I would ever even try to hack. This is a beautiful pattern worth every penny, and I'm not paid in any way to say that. No free pattern, no affiliate link, nothing folks. I just love an interesting pattern that works like magic.

The biggest thing you need to know before sewing this, actually before cutting this, is that picking a size is going to be critical. Really look at the size guidelines and the finished measurement chart. You will see that there is quite a bit of negative ease since it calls for nice stretchy fabric. However, if you aren't comfortable highlighting your mid-section, you need to be careful. Last time I made this, I felt like it was just a little tighter than I'd like so I sized up this time and am much more comfy in it. The other nice thing about that mid-section is that the front is 2 layers thick so it feels good, it feels like it's hiding something and holding something in.


Another cool thing about the front being 2 layers thick, is that it makes for a blank canvas for embroidery with a clean lining or a great spot for reverse applique. I opted for a tone on tone embroidery pattern in keeping with my mostly solid but not too boring capsule wardrobe. Burgundy is a big trend this fall. I didn't know that when I ordered this fabric from Girl Charlee this summer, but it's always been one of my favorites so that was lucky.


I always have a hard time taking pictures with my crappy camera, but this color and the light outside were extra difficult today. I still wanted to share my awkward pics with you though because the main reason I blog is to share ideas. Sharing is caring, my kindergartener says.


I know you can't see that stitching at all, so here's another close up.


Monday, October 24, 2016

Embroidered Bimaa & LIV Skirt


Elena needed some gray leggings. That's where it started. I had this scrap of Girl Charlee gray cotton lycra that was the perfect width. It was a few inches longer than necessary and it seemed like a waste to not use it all, so I cut them as long as I could and added rouching to the bottom 3 inches. They turned out great, and then I noticed this aqua cotton spandex print (not available now I see) also from Girl Charlee sitting there and what a good match. 

Elena really digs hoods. She wears them up all the time, even in the house. The LouBee Bimaa is my favorite hooded shirt pattern and I already had it printed out and traced in a size 5. The only change I made was to add an inch to the bottom so I could hem it instead of doing the band.

I know I could cut that fabric and sew that top up in under an hour, but I made myself slow down. I was thinking I love aqua with yellow and maybe I could add some yellow to this top so she would wear it with her "banana pants" too. I'm still trying to get her to like those yellow cords. I already had the perfect shade of yellow embroidery floss so I went to work embellishing with french knots, stem stitches, back stitches...


Have you ever had someone say to you, "I like your top. Kohl's right? I have it in blue." Man, I hate that. I think that one of my goals in making clothes myself is to make them unique. It is hugely important to me. I want styles that you would see in a store, but I want them to be unique. The embellishments are an easy way to do that. 


I used part of a thin yellow t-shirt to line most of the hood. I wanted something lighter weight than the aqua and I wanted to tie the yellow in some more. The yellow is definitely a fun pop of color when the hood is down.

The skirt is the free LIV skirt pattern from Sofilantjes Patterns. I've made several before and love it for how little fabric it uses and how quick it is to sew. You can go really basic or have fun with the pockets and mixing fabrics. I used another yellow t-shirt and scraps of the gray and aqua. So little waste with this outfit. I also love that you don't need elastic for it. The waistband uses just the perfect sized piece of cotton spandex for a really comfy skirt.


I think I'm done sewing for Elena for a while. She will need a dress for Christmas, but nothing else that I'm aware of. I reserve the right to trump minimalism with creativity whenever the need hits. I have a couple pieces for myself that I need to show you as soon as I can get pictures. I'm going to be letting my blog domain name go in mid-November so I'll have to figure out if that messes things up much. The blog name will hopefully just revert back to workpraysew.blogspot.com, I'm assuming. So if you have trouble finding me soon, just add in the blogspot part. The tech-side of blogging is no bueno for me and I'm beyond wanting to learn it I've decided. Have a great week!

Friday, October 7, 2016

Chambray Ansley Tunic with Embroidery


This is my third and final outfit for Elena for this fall. The tunic is a modified Ansley top from Blaverry Patterns. I lowered the neckline half an inch, added a tie-back belt, and put elastic in the sleeves instead of cuffs. I think I changed the hi/low length a little too making it as long as my fabric allowed for. I also lined the bodice pieces so that the embroidery wouldn't be exposed on the back and against her skin. 


The fabric is a speckled chambray from the Imagine Gnats shop. It was great to work with. I would definitely use this again. Rachel is having a meet and greet event at her shop tomorrow that I'd love to go to. I have to drive an hour south of home tomorrow for a swimming meet but I'll still be 3 hours north of her so I guess I won't make it this time.


 The embroidery is my own design. I was pretty proud of myself for not spending hours and hours trying to decide what to do. I just went with the first thought I had and then added on. Very organic. Just letting it happen. (Very unlike the top I've been trying to design for myself and can't decide on.)
And looking at that picture reminds me that I also changed the button placket and hid my buttons on the backside. That was because the bodice felt too wide and this way my embroidery design wouldn't be interrupted.


So I have to also mention the "banana pants" as Elena calls them. She is not fond of them, but I hope they grow on her because they are pretty awesome. The fabric is mustard stretch corduroy from CaliFabrics. The pattern is the LouBee Clothing Hosh pants. Size 3 width, 5 length. No other changes. Plain and simple and oh so soft.


Poor kid really hates this blogging business.


Sunday, September 18, 2016

Upcycling a Nessie Top and Hosh Pants

Welcome to my Project Run & Play sewalong look for week 2: I'm An Autumn. Fall clothes are THE best. I've always loved getting new clothes for fall and then look forward to the weather cooling off enough to wear them. I love the deep, warm colors of fall and I also tend to think of texture with fall clothes - think chunky sweater knits, corduroy, etc.

One of my favorite aspects of sewing for children is that with smaller fabric requirements, you can upcycle a lot of the time. Having her only sister 13 years older than her means that while there is a good pile of hand-me-downs for Elena, only some of them are classic enough to save as is for future years, but many wind up being remade. I like that upcycling costs me no money, but I also like the nostalgia of seeing Olivia's clothes worn by her little sister.

http://www.workpraysew.com/2016/09/upcycling-nessie-top-and-hosh-pants.html

The pants are LouBee Clothing Hosh Pants with added welt pockets on the front. They began their life as a dress from Old Navy. It's a medium to heavy weight knit with good stretch and recovery. After cutting the dress apart I noticed that the back of the dress had a center seam that I had to straighten out before I could use it. I used a straight edge and marked where to sew a new seam to straighten it. This means that one pant leg has an outer seam, but who is really going to notice that?


I fancied up the pants a bit by adding welt pockets. I made WELT POCKETS! This has been on my sewing bucket list for well over a year. I'm so glad I did it because 1.) they were the perfect pocket for a pant with no (or only 1,  heehee) side seam and 2.) I feel like a sewing genius now. After watching a couple of video tutorials, I wasn't too scared of the sewing, it was the placement. I was hacking here and totally guessing as to where to put that first one and then not so confident about making the other one match it. So stressful. But it turned out well and now I have the confidence to welt all the pockets.


The shirt is the really fun part. It is made from a long sleeved tee my mom passed off and a tiny piece of rayon/spandex knit from CaliFabrics. I used my favorite old Craftiness Is Not Optional Nessie Top. Gosh, I love that pattern. This upcycle was meant to be. Look at this pattern layout in the next picture and see how little of the shirt was wasted.


So a recycled Hosh pant and Nessie top outfit came to life. I can't tell you how much I enjoyed the process of making this one. Between pushing myself to try the welt pockets and the fear of cutting through the second layer on the bodice portion, this one was a roller coaster of emotions. The process and all the nerves were well worth it. I'll do a tutorial on how to do the textured reverse applique technique later this week. And now, more pictures.

(Edited 9/22/16: The tutorial is here.)

http://www.workpraysew.com/2016/09/upcycling-nessie-top-and-hosh-pants.html

http://www.workpraysew.com/2016/09/upcycling-nessie-top-and-hosh-pants.html


http://www.workpraysew.com/2016/09/upcycling-nessie-top-and-hosh-pants.html


Monday, September 12, 2016

Pokemon Inspiration for Project Run & Play

I absolutely love sewing along with Project Run & Play. I (pretty much) always love the themes they choose for each week and love that it gets my creativity going. I'm grateful to have the time and energy to sew again now that school is in session. It feels like there is time again to do what makes me happy. Sewing for Elena makes me happy.

This week's inspiration is Pokemon. Andrew is 16 now but Pokemon was huge for him when he was 8 or 9. It's something he had been sharing with Elena for the last couple of years - watching the shows together, looking at his old cards, and he even found the half dozen Pokemon stuffies he had stored away. So this was something they shared even before the Pokemon Go thing hit. It was so cute to see him take his little sister (11 years younger than him) out Pokemon hunting this summer.

We decided to do a loose interpretation of Butterfree since we love butterflies. Who doesn't love butterflies?
                                                Image result

I remembered a skirt that Olivia used to have that had similar colors and in an abstract butterfly print. Perfect. You know I love refashions, but this one makes me extra happy since Olivia has been gone 2 weeks now and this is a way to keep her in our daily lives seeing her clothes on Elena. I remade the skirt into another skirt (boring, I know) and made a long sleeved tee with a butterfly applique.


There isn't much to say about the skirt. All I had to do was cut the waistband off and shorten it in width and height and serge it back onto the skirt bottom. That may have taken all of 6 minutes, but I really love it and so does she.


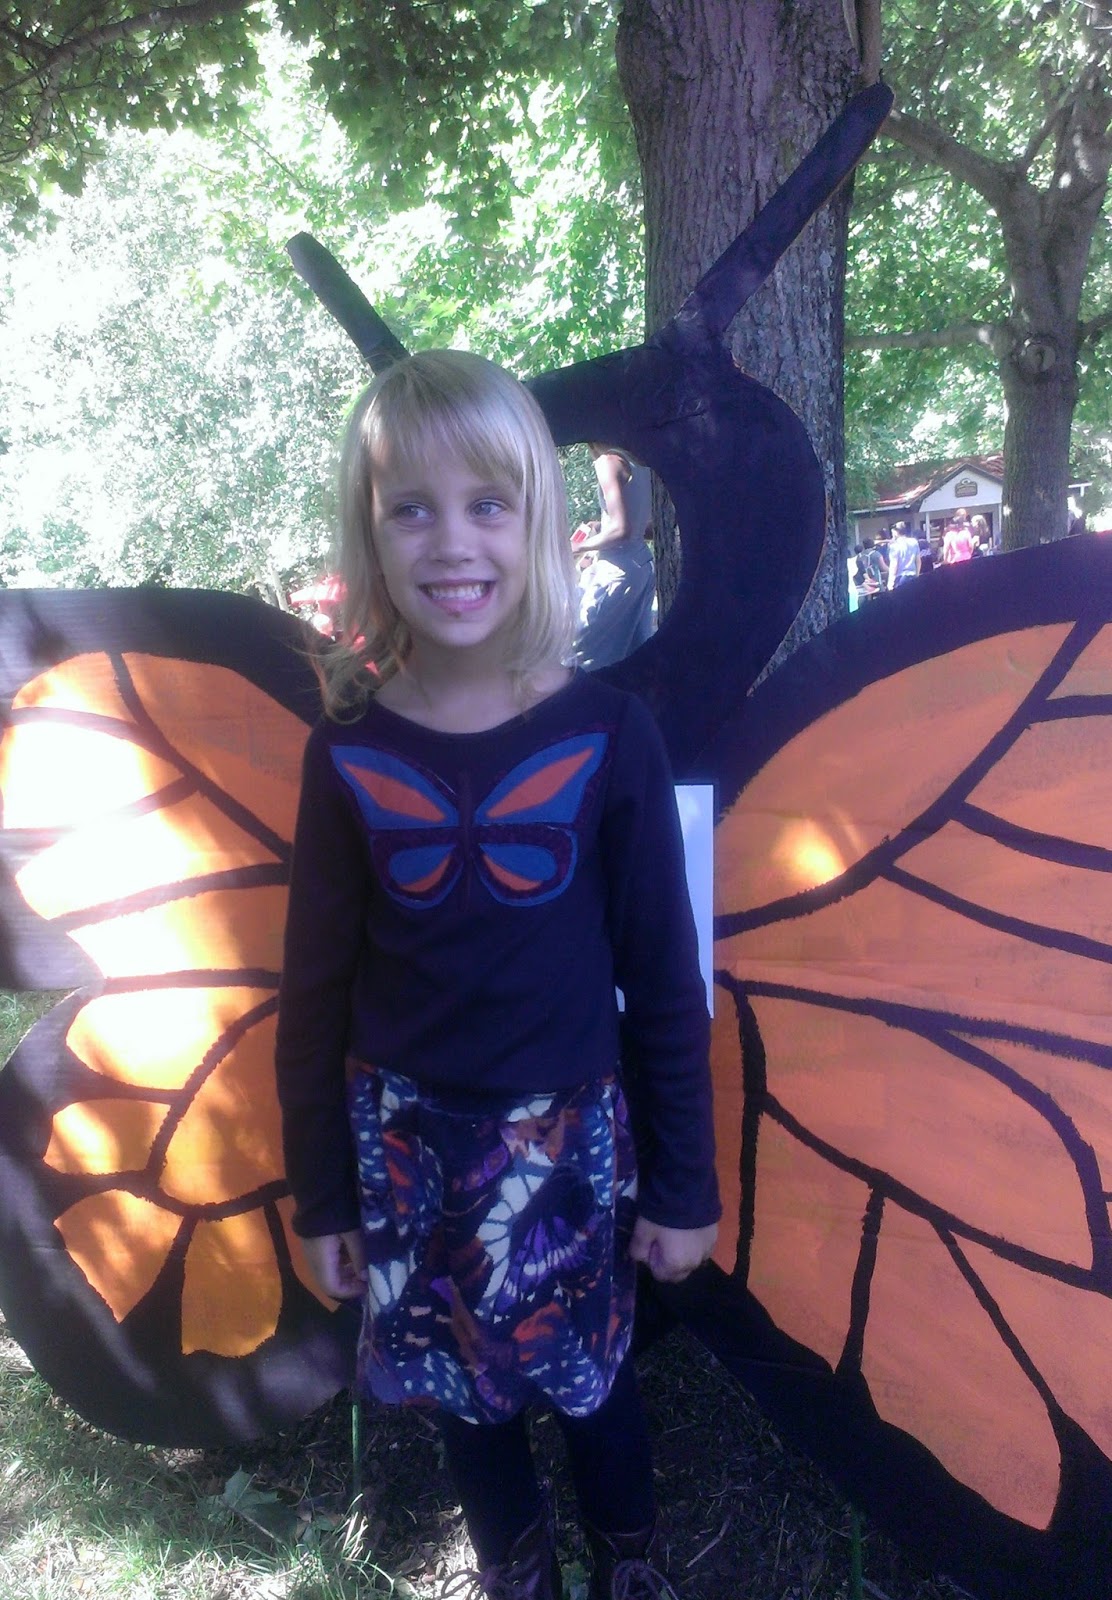
The t-shirt was based off the bodice portion of the Willow & Stitch Gumnut dress pattern. I like the more feminine neckline it has for a basic tee so it was worth it to make the necessary changes. I just had to extend the overall length and the sleeve length. Easy to do with just a few measurements. The fabric is black interlock that I think came from the remnant bin at Joann's. I had about a half a yard and it was plenty. The neck and sleeves are finished with self bindings instead of bands for a nicer clean finish.

http://www.workpraysew.com/2016/09/pokemon-inspiration-for-project-run-play.html

The applique was the fun part. I spent about 2 hours trying out various butterfly shapes and sizes and auditioning all the various scraps. Sometimes having so many options (hello giant scrap bin) makes things so much harder. Elena helped out a lot with this part because I really wanted to feature colors of her choosing. Then I used a washable glue stick to stick it all down before machine stitching everything with matching color threads.


A huge storm blew through Saturday leaving us with gorgeous sunny and cooler weather to attend a Bug Day event at a local park on Sunday. Of course you have to wear your new butterfly outfit to the Bug Day. The park was so crowded though that it was actually hard to find a place to take pictures without photobombers.  This fun monarch butterfly cut-out was lucky though.


Thanks for looking. We'll be back next week with our Autumn inspired look. I don't know which outfit I like better, but I'm sure having fun with these themes. Have a great week.