Showing posts with label embellishments. Show all posts

Friday, March 24, 2017

A Boho Chic Easter Dress

I knew I'd sew along to at least one of the Project Run and Play themes, but the question is, would Elena model for me? And that'll be a big fat NO. It was an almost - she had everything on and then in the 2 minutes it took me to run upstairs for different shoes, she ripped everything off and was done. I'd like to call her names, but that wouldn't be nice. So my feelings are hurt, but the good news is that the dress looks so completely adorable on her. I couldn't be happier about that part of it.

I used the Heidi & Finn Modern Color Block Dress Pattern and made only one modification - I added side seam pockets. Since I was using all one fabric, I didn't really need to cut the pieces separately but I did anyway to make it easy to add the lace in a nice straight line. I love this pattern because it is a nice simple shape, it's easy to sew, and it's fully lined. Elena loves this pattern because of the simple shape - meaning no ruffles or frills. Little girl is going tomboy on me - which is cool except for Easter. Sorry kiddo, you're wearing a dress.


The crochet lace was given to me by my mother and I have no idea how it came to her. She probably picked it off of a tablecloth or something if I know her. The fabrics were a prize I won ages ago - so long ago that I don't know how or from whom. I kept the selvege, but now I can't find it. (Such a bad blogger.) I remember that it said they were printed in Japan. I did an image search and I'm sorry to say, it can't find it anywhere.  Here's the inside, nice and clean (but a little wrinkled- oops).


I didn't put the lace on the upper back because I felt like it would be uncomfortable and would make it difficult to sew the opening which happens to be the trickiest part of this pattern by the way. I taped those 2 pattern pieces together and cut it as one piece. I chose a nice wooden button from my stash.


I thought Elena might faint at the sight of the headband I made up from some FOE and 3 store-bought flowers, but she actually likes it and put it on immediately. So maybe she will be a tomboy with floral headbands this summer. It looks especially good worn low, hippie style. 


Hopefully on Easter I'll be able to sneak a couple pictures of her in it and post them on Instagram. 


Thursday, March 2, 2017

A Girlier Lane Raglan

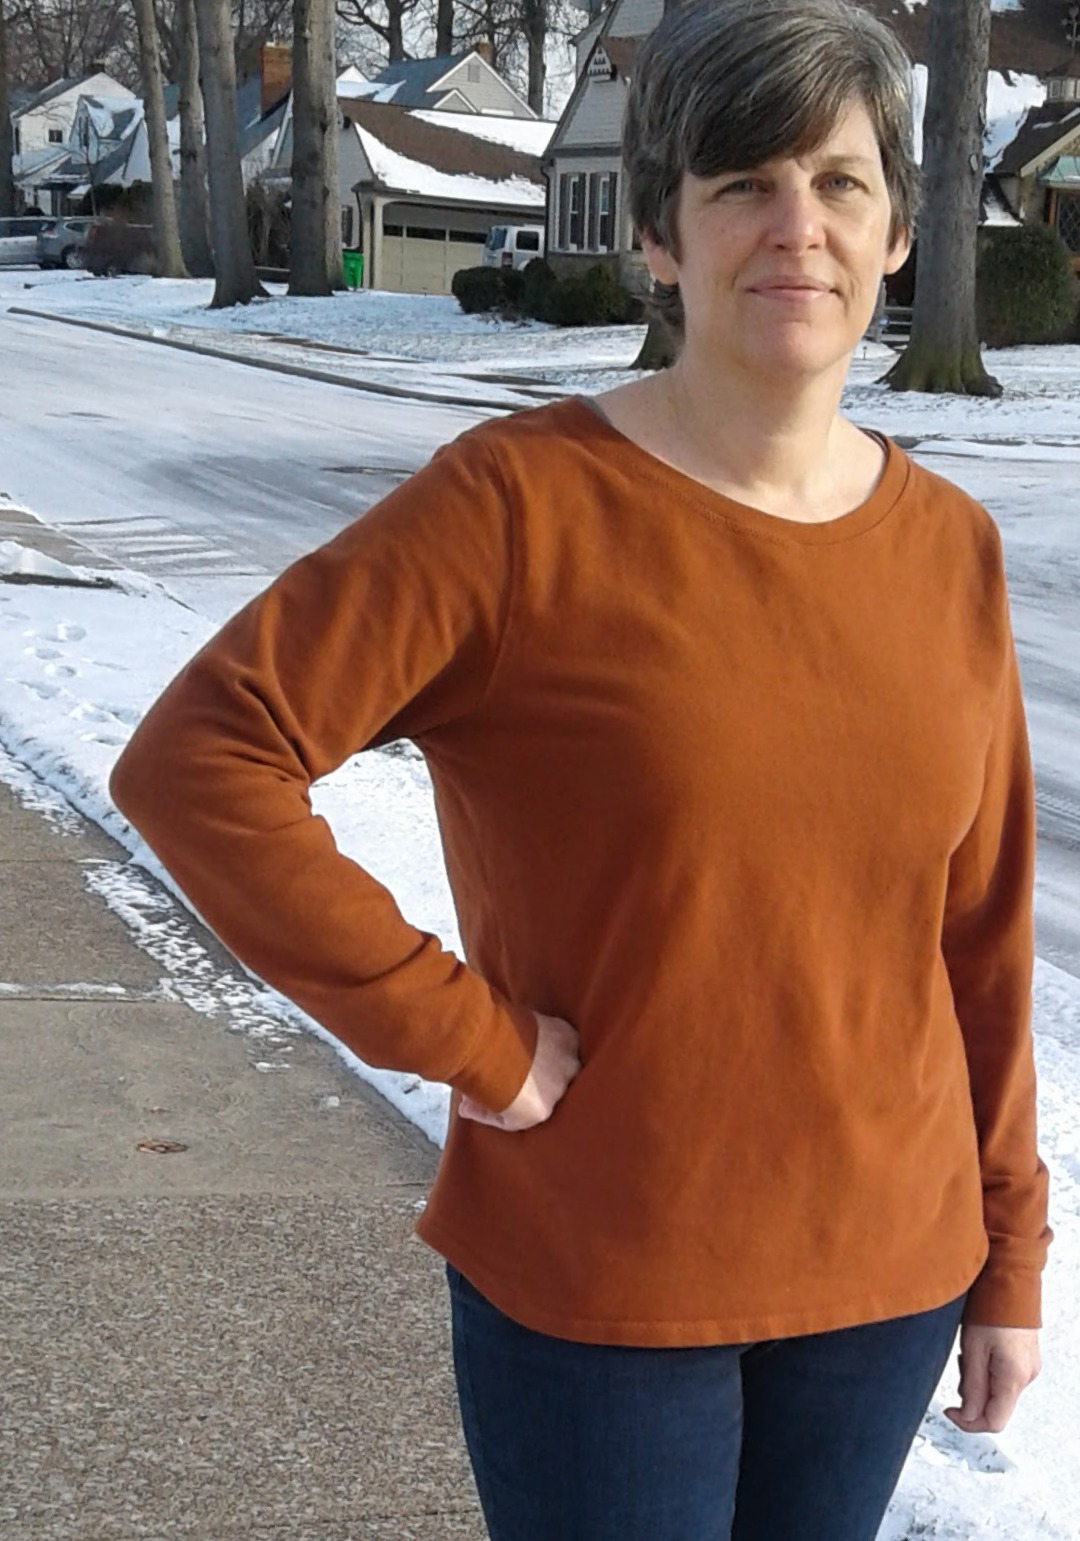
If you look at this picture...


...you might think I made a Lane Raglan. No big deal. Right? We've all made a bazillion Lanes by now. But there are a few things I want to show you about this particular Lane Raglan.

The first is the that I followed some advice I'd never heard before and cut my neckband on the bias. This comes from Melissa at Melly Sews and I think it turned out great. This fabric doesn't have a ton of stretch so I think it was key in getting a nice flat neckband. Check out her post here.

The second thing is the change to the sleeve.


I copied the proportions of a knit top I bought at Kohl's this winter. I cut the sleeves at 6 inches and added 6 inch bells or ruffles or whatever you want to call them, for 3/4 length sleeves overall. There is only 4" of extra width gathered in so they aren't too full.

The third thing is the stitching.


I'm still on the decorative stitching instead of double needle stitching kick. It's just so easy and adds a nice touch. This is stitch #40 on my Singer Quantum Stylus. You know how long that would take me by hand? I do enjoy hand embroidery, but this is so much quicker. Just be sure you have enough thread on both your top thread and bobbin before you start each area because running out in the middle of a line is not attractive. I used this to hem the sleeves and bottom as well and also to topstitch the neckband down.


The last thing I want to talk about is the fit. It's a bit tight in the chest. I'm sure you noticed but were too nice to say anything. So here's my excuse. This top fought me every step of the way. I started out using a completely different pattern for a draped front raglan that I've made in the past. BUT, I just didn't like how it looked in this fabric AND I accidentally attached the front piece inside out! I had serged and lightening bolt stitched so there was no chance of unpicking the whole thing. So I cut it apart and was able to re-cut the front and back pieces and cut entirely new sleeves using the Lane pattern, but the sleeves had to be shorter and I had to use the tiniest seam allowances possible.

So it is a bit snug, but I'm not worried because I gave up dairy for Lent and should be able to drop my winter weight pretty quickly while I suffer through Mexican food sans cheese and no homemade yogurt with homemade granola for breakfast, etc. My chest is one of the first places I lose weight, so that's kind of good news for this top.


What I really like about this top is that it's basically a t-shirt and suits my casual everyday style, but I feel like it can be dressed up a bit too. The fabric is a wool jersey that was nice to work with and feels good - not like wool in other words.


This top makes me feel ready for spring, but I really need some new jeans and pants in general. I think I'll wait and see how much the lower half of me loses though before I shop or sew much more for me.

Tuesday, February 21, 2017

Skip the Double Needle Hem


I made myself this sweatshirt back in November and it took me until now to get some pictures of myself in it. I wear this about once a week because it is so warm and comfy. The fabric is organic french terry from Cali Fabrics last year. They still have it in forest green if you are interested in using great organic fabric that feels good and you can feel good about using.


The pattern used here is the Sofilantjes Otium Sweater again. The only change I made was to round the bottom up at the sides a little. This is the most basic version of the pattern and I realize it's not exactly exciting, so why I am blogging this you may be wondering.


It took me a couple of years to get smart and read my sewing machine manual to learn to properly use my double needle for hemming and topstitching. Now I'm a pro at it, but I still find it annoying. I have to wind an extra bobbin and change the needle. Not that that is so awful, but there is another way. A lot of the decorative stitches on my machine are stretch stitches too. A quick snap on of a different foot and you can be in business. For this sweatshirt, I used matching thread to add subtle details at the seams and the bottom hem. It's such a quick and easy way to add a small detail to a basic without needing another machine. I was thinking of using this technique with that fun rainbow variegated thread for a top for Elena. I think she'd like that.


The snow has melted, spring is not far off. I'm really getting excited about spring/summer sewing ideas so I hope to be back soon with something fun to show you.

Monday, October 24, 2016

Embroidered Bimaa & LIV Skirt


Elena needed some gray leggings. That's where it started. I had this scrap of Girl Charlee gray cotton lycra that was the perfect width. It was a few inches longer than necessary and it seemed like a waste to not use it all, so I cut them as long as I could and added rouching to the bottom 3 inches. They turned out great, and then I noticed this aqua cotton spandex print (not available now I see) also from Girl Charlee sitting there and what a good match. 

Elena really digs hoods. She wears them up all the time, even in the house. The LouBee Bimaa is my favorite hooded shirt pattern and I already had it printed out and traced in a size 5. The only change I made was to add an inch to the bottom so I could hem it instead of doing the band.

I know I could cut that fabric and sew that top up in under an hour, but I made myself slow down. I was thinking I love aqua with yellow and maybe I could add some yellow to this top so she would wear it with her "banana pants" too. I'm still trying to get her to like those yellow cords. I already had the perfect shade of yellow embroidery floss so I went to work embellishing with french knots, stem stitches, back stitches...


Have you ever had someone say to you, "I like your top. Kohl's right? I have it in blue." Man, I hate that. I think that one of my goals in making clothes myself is to make them unique. It is hugely important to me. I want styles that you would see in a store, but I want them to be unique. The embellishments are an easy way to do that. 


I used part of a thin yellow t-shirt to line most of the hood. I wanted something lighter weight than the aqua and I wanted to tie the yellow in some more. The yellow is definitely a fun pop of color when the hood is down.

The skirt is the free LIV skirt pattern from Sofilantjes Patterns. I've made several before and love it for how little fabric it uses and how quick it is to sew. You can go really basic or have fun with the pockets and mixing fabrics. I used another yellow t-shirt and scraps of the gray and aqua. So little waste with this outfit. I also love that you don't need elastic for it. The waistband uses just the perfect sized piece of cotton spandex for a really comfy skirt.


I think I'm done sewing for Elena for a while. She will need a dress for Christmas, but nothing else that I'm aware of. I reserve the right to trump minimalism with creativity whenever the need hits. I have a couple pieces for myself that I need to show you as soon as I can get pictures. I'm going to be letting my blog domain name go in mid-November so I'll have to figure out if that messes things up much. The blog name will hopefully just revert back to workpraysew.blogspot.com, I'm assuming. So if you have trouble finding me soon, just add in the blogspot part. The tech-side of blogging is no bueno for me and I'm beyond wanting to learn it I've decided. Have a great week!

Wednesday, September 21, 2016

A Tutorial on a Textured Reverse Applique Technique


I'm back as promised to explain how to do the fabric manipulation technique I used in my last post.
The top is the CINO Nessie top pattern using the colorblock option. That's right, I didn't even have to hack the pattern. It comes this way - ready to embellish! 


 Now, I didn't think this up myself to be honest. I saw this pin that doesn't really lead to a tutorial or anything, but I did want to give credit. The pinned example looks to be made of felt, but I thought it would work well with knits. I've kind of got a thing for reverse applique so this really charmed me.

This technique is pretty simple but gives big results. You will need to cut 2 pieces of that upper bodice in contrasting fabrics. Most any knit will work. These happen to be a cotton/spandex and a rayon/spandex underneath. As long as it doesn't fray, you are in business. Stack them on top of each other right sides up. You can baste around the edges if you like, but on a small piece like this, I didn't bother. (You could also cut 2 rectangles big enough for your pattern piece, do the technique, and then cut out your actual pieces from your new "fabric")


Use a ruler with a 45 degree angle to mark lines across. I used chalk and spaced mine 3/4" apart.


Sew across those lines with a straight stitch. I chose matching thread but imagine the possibilities. I used a stitch length of 2.5 as usual, but larger would be cool too.


Now mark the lines the same distance in the opposite direction and then sew them too.


Now comes the scary part. You will need to use some small scissors to cut away the 2 bottom sides of each square. Gently pull the 2 layers apart and pinch the bottom corner. Picture a vertical line running down to that point at the bottom. Make a small snip at the center bottom. If you centered it well, it will make it easy to then cut up to the corner on each side. The first few will feel scary as heck, but you will get quicker and more confident after just a few squares. I've done other reverse applique projects (you can see them here) where I completely cut away that top layer so it didn't matter how neat or perfectly placed that first snip was. With this, you are leaving the whole top layer there so you do need to be as accurate as possible with that first snip. You could always practice on a scrap first if you are really worried.


Then just sew up the pattern as usual. I waited to cut open some of the squares that were near the edges until after I sewed the rest of the shirt. I didn't open a couple at all if I thought they might stick out funny near a seam. 


So that's all there is to it. If you try it, I'd love to see your project so please post a link in the comments if you do. Be brave and have fun.


Sunday, September 18, 2016

Upcycling a Nessie Top and Hosh Pants

Welcome to my Project Run & Play sewalong look for week 2: I'm An Autumn. Fall clothes are THE best. I've always loved getting new clothes for fall and then look forward to the weather cooling off enough to wear them. I love the deep, warm colors of fall and I also tend to think of texture with fall clothes - think chunky sweater knits, corduroy, etc.

One of my favorite aspects of sewing for children is that with smaller fabric requirements, you can upcycle a lot of the time. Having her only sister 13 years older than her means that while there is a good pile of hand-me-downs for Elena, only some of them are classic enough to save as is for future years, but many wind up being remade. I like that upcycling costs me no money, but I also like the nostalgia of seeing Olivia's clothes worn by her little sister.

http://www.workpraysew.com/2016/09/upcycling-nessie-top-and-hosh-pants.html

The pants are LouBee Clothing Hosh Pants with added welt pockets on the front. They began their life as a dress from Old Navy. It's a medium to heavy weight knit with good stretch and recovery. After cutting the dress apart I noticed that the back of the dress had a center seam that I had to straighten out before I could use it. I used a straight edge and marked where to sew a new seam to straighten it. This means that one pant leg has an outer seam, but who is really going to notice that?


I fancied up the pants a bit by adding welt pockets. I made WELT POCKETS! This has been on my sewing bucket list for well over a year. I'm so glad I did it because 1.) they were the perfect pocket for a pant with no (or only 1,  heehee) side seam and 2.) I feel like a sewing genius now. After watching a couple of video tutorials, I wasn't too scared of the sewing, it was the placement. I was hacking here and totally guessing as to where to put that first one and then not so confident about making the other one match it. So stressful. But it turned out well and now I have the confidence to welt all the pockets.


The shirt is the really fun part. It is made from a long sleeved tee my mom passed off and a tiny piece of rayon/spandex knit from CaliFabrics. I used my favorite old Craftiness Is Not Optional Nessie Top. Gosh, I love that pattern. This upcycle was meant to be. Look at this pattern layout in the next picture and see how little of the shirt was wasted.


So a recycled Hosh pant and Nessie top outfit came to life. I can't tell you how much I enjoyed the process of making this one. Between pushing myself to try the welt pockets and the fear of cutting through the second layer on the bodice portion, this one was a roller coaster of emotions. The process and all the nerves were well worth it. I'll do a tutorial on how to do the textured reverse applique technique later this week. And now, more pictures.

(Edited 9/22/16: The tutorial is here.)

http://www.workpraysew.com/2016/09/upcycling-nessie-top-and-hosh-pants.html

http://www.workpraysew.com/2016/09/upcycling-nessie-top-and-hosh-pants.html


http://www.workpraysew.com/2016/09/upcycling-nessie-top-and-hosh-pants.html


Sunday, July 17, 2016

Simplicity 4237 & 1616 Mash-Up Skirt

Jersey maxi skirts have become a staple in most of our closets. They are easy to make and easy to wear. Dress them up, dress them down, but how do you keep them interesting and how do you keep from tripping on them?

I've used Simplicity 4237 (out of print but available secondhand) multiple times to make skirts of different lengths so using it again was a no-brainer. I did my usual change to the waistband piece by halving it's height and inserting 2" elastic instead of doing the fold-down yoga band. It feels sturdier for my mom-belly this way. The other big change was to use the bottom hi-low shape of Simplicity 1616 view B and to shorten the whole thing to a long midi/short maxi. This way I don't have to hitch up my skirt to run up and down the steps all day. I think this is brilliant because I still get all the swish of a maxi skirt but the higher front feels so practical.


Since S4237 isn't easy to come by, you could just use S1616 but cut the front and back pieces in half adding seam allowance. I haven't compared the actual pattern pieces, but I might next time I need to make a skirt. For now, sorry, too much trouble to locate the specific pieces in the envelope and open tissue pattern pieces and fold them back up neatly. Do you forgive me for being so lazy?

This fabric is a medium weight rayon (blend?) jersey from CaliFabrics (but they don't have it anymore). It has held up really well. I've been wearing this once a week since late May and it still looks new. Yes, I'm super behind on blogging. My last post was weeks, almost months, ago. Sorry about that, but summer is NUTS around here. I think it is for most of us so I'm sure you understand.


Did you notice the handstitching of all of the vertical seams? I sewed up the 4 seams and then before hemming or adding the waistband, I used pearl cotton to handstitch x's across the seams to spice it up a little. The goal was to add a little texture while remaining monochromatic and neutral. That's my best suggestion for anyone interested in capsule wardrobing. It really didn't even take all that long.


The inspiration for this stitching came from this pin. 


That's it folks. That's my favorite new skirt I've been meaning to show you for weeks. Summer and blogging just don't mix. I'd like to welcome all my new followers. Thanks for joining me here. I have more to post, just need to find the time to do it.