Tuesday, February 21, 2017

Skip the Double Needle Hem


I made myself this sweatshirt back in November and it took me until now to get some pictures of myself in it. I wear this about once a week because it is so warm and comfy. The fabric is organic french terry from Cali Fabrics last year. They still have it in forest green if you are interested in using great organic fabric that feels good and you can feel good about using.
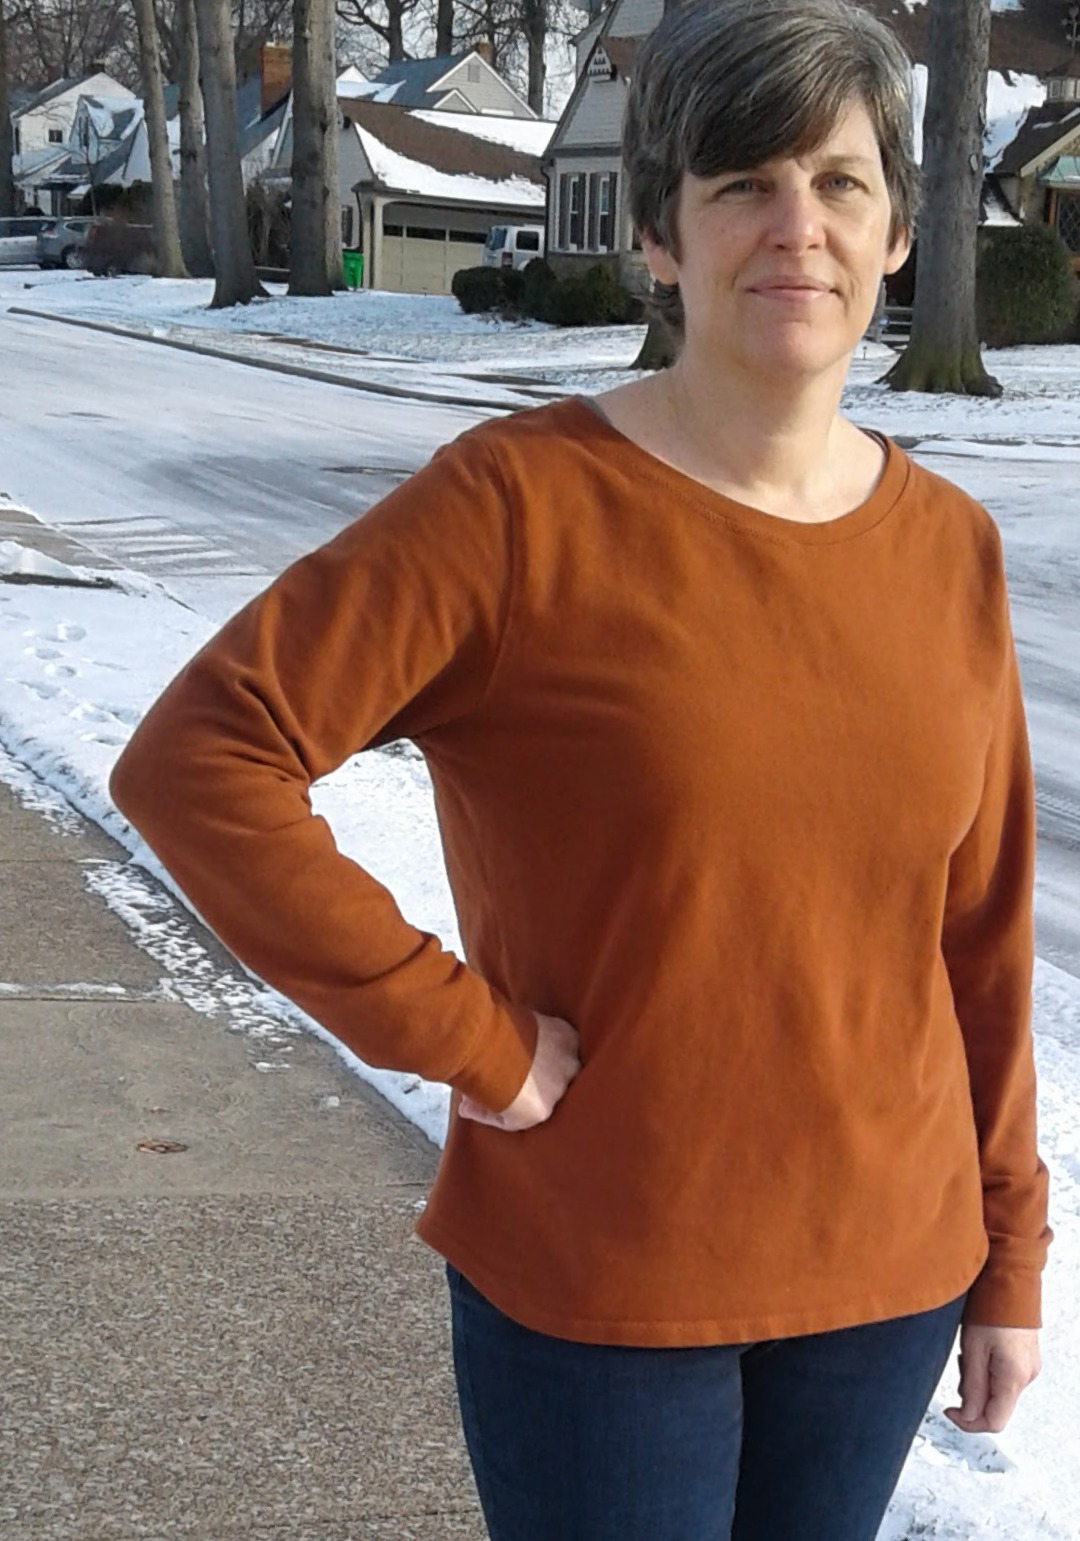

The pattern used here is the Sofilantjes Otium Sweater again. The only change I made was to round the bottom up at the sides a little. This is the most basic version of the pattern and I realize it's not exactly exciting, so why I am blogging this you may be wondering.


It took me a couple of years to get smart and read my sewing machine manual to learn to properly use my double needle for hemming and topstitching. Now I'm a pro at it, but I still find it annoying. I have to wind an extra bobbin and change the needle. Not that that is so awful, but there is another way. A lot of the decorative stitches on my machine are stretch stitches too. A quick snap on of a different foot and you can be in business. For this sweatshirt, I used matching thread to add subtle details at the seams and the bottom hem. It's such a quick and easy way to add a small detail to a basic without needing another machine. I was thinking of using this technique with that fun rainbow variegated thread for a top for Elena. I think she'd like that.


The snow has melted, spring is not far off. I'm really getting excited about spring/summer sewing ideas so I hope to be back soon with something fun to show you.

Thursday, January 5, 2017

Wool Jersey Otium Sweater Hack

Happy New Year! It's been a busy couple of months since I've posted, but let's just pick up where we left off. It'll feel like reconnecting with your old college friend you haven't talked to in ages. You don't need to hear what's been keeping me away, let's just be happy to be back together.

I treated myself to a few cuts of wool knits from the Imagine Gnats shop. My first make of this year is a Sofilantjes Otium Sweater hack using this wool jersey. This is my first time purchasing and using wool jersey, but it won't be my last! I think it has surprised me in a couple of ways. First off, it's soft. I was worried about buying online without feeling it, but I read a review that said it was soft, and it is. No scratchiness at all. The second surprise was that it was completely easy to sew with requiring no special anything.


The only pictures I have are selfies in the mirror. Several technological difficulties have happened around here lately and it's been pretty tough to keep up with all the changes. As it is, my laptop is hooked up to a 32" TV right now for me to even post this. I was pretty pleased with myself for figuring out that I could unhook teen boy's Xbox and plug that cord into my laptop to use the TV as a monitor. Yay me.


If you aren't familiar with the Otium Sweater pattern, I'll tell you it's a great basic that has some options to dress it up. I have the bundle pack so I've made several for all the women in the house. I did make a couple small changes of my own to this one. For starters, I cut the bodice pieces 3" shorter, but then cut a large 10" band to double up for the bottom. I did this as a design detail but also to add weight to the top so it would hang nicely.


Being familiar with the pattern, I knew that the sleeve length is nice and generous already requiring no additional length for me whereas I often have to add length to other designers patterns. I wanted a long, slouchy sleeve look though, so I cut the cuffs double the usual length. I also narrowed them some to fit my bony wrists snugly. Love how they turned out.


The pattern calls for finishing the neck with a band, but I simply turned and topstitched with my double needle and matching thread. The front is possibly a bit higher also. I cut it much higher but then cut some back off so I can't really say how much different it is from the pattern.

So that's it. Today, our outdoor temp is 21 degrees. We keep our house at no more than 68 during the day. I'm wearing a silky (poly I guess, though I wish it was silk) cami underneath and am completely warm and comfortable. The first make of 2017 is a success. I have the next wool top cut out in this fabric and ready to sew so hopefully I'll be back next week with that one.


Sunday, November 20, 2016

You can now find me at workpraysew.blogspot.com

<a href="https://www.bloglovin.com/blog/11074411/?claim=pdkkxvaed95">Follow my blog with Bloglovin</a>

Tuesday, November 1, 2016

My Embroidered Legends Top

I consider myself to be a pretty decent pattern hacker, but the Sew Straight & Gather Legends Top is not something I would ever even try to hack. This is a beautiful pattern worth every penny, and I'm not paid in any way to say that. No free pattern, no affiliate link, nothing folks. I just love an interesting pattern that works like magic.

The biggest thing you need to know before sewing this, actually before cutting this, is that picking a size is going to be critical. Really look at the size guidelines and the finished measurement chart. You will see that there is quite a bit of negative ease since it calls for nice stretchy fabric. However, if you aren't comfortable highlighting your mid-section, you need to be careful. Last time I made this, I felt like it was just a little tighter than I'd like so I sized up this time and am much more comfy in it. The other nice thing about that mid-section is that the front is 2 layers thick so it feels good, it feels like it's hiding something and holding something in.


Another cool thing about the front being 2 layers thick, is that it makes for a blank canvas for embroidery with a clean lining or a great spot for reverse applique. I opted for a tone on tone embroidery pattern in keeping with my mostly solid but not too boring capsule wardrobe. Burgundy is a big trend this fall. I didn't know that when I ordered this fabric from Girl Charlee this summer, but it's always been one of my favorites so that was lucky.


I always have a hard time taking pictures with my crappy camera, but this color and the light outside were extra difficult today. I still wanted to share my awkward pics with you though because the main reason I blog is to share ideas. Sharing is caring, my kindergartener says.


I know you can't see that stitching at all, so here's another close up.


Monday, October 24, 2016

Embroidered Bimaa & LIV Skirt


Elena needed some gray leggings. That's where it started. I had this scrap of Girl Charlee gray cotton lycra that was the perfect width. It was a few inches longer than necessary and it seemed like a waste to not use it all, so I cut them as long as I could and added rouching to the bottom 3 inches. They turned out great, and then I noticed this aqua cotton spandex print (not available now I see) also from Girl Charlee sitting there and what a good match. 

Elena really digs hoods. She wears them up all the time, even in the house. The LouBee Bimaa is my favorite hooded shirt pattern and I already had it printed out and traced in a size 5. The only change I made was to add an inch to the bottom so I could hem it instead of doing the band.

I know I could cut that fabric and sew that top up in under an hour, but I made myself slow down. I was thinking I love aqua with yellow and maybe I could add some yellow to this top so she would wear it with her "banana pants" too. I'm still trying to get her to like those yellow cords. I already had the perfect shade of yellow embroidery floss so I went to work embellishing with french knots, stem stitches, back stitches...


Have you ever had someone say to you, "I like your top. Kohl's right? I have it in blue." Man, I hate that. I think that one of my goals in making clothes myself is to make them unique. It is hugely important to me. I want styles that you would see in a store, but I want them to be unique. The embellishments are an easy way to do that. 


I used part of a thin yellow t-shirt to line most of the hood. I wanted something lighter weight than the aqua and I wanted to tie the yellow in some more. The yellow is definitely a fun pop of color when the hood is down.

The skirt is the free LIV skirt pattern from Sofilantjes Patterns. I've made several before and love it for how little fabric it uses and how quick it is to sew. You can go really basic or have fun with the pockets and mixing fabrics. I used another yellow t-shirt and scraps of the gray and aqua. So little waste with this outfit. I also love that you don't need elastic for it. The waistband uses just the perfect sized piece of cotton spandex for a really comfy skirt.


I think I'm done sewing for Elena for a while. She will need a dress for Christmas, but nothing else that I'm aware of. I reserve the right to trump minimalism with creativity whenever the need hits. I have a couple pieces for myself that I need to show you as soon as I can get pictures. I'm going to be letting my blog domain name go in mid-November so I'll have to figure out if that messes things up much. The blog name will hopefully just revert back to workpraysew.blogspot.com, I'm assuming. So if you have trouble finding me soon, just add in the blogspot part. The tech-side of blogging is no bueno for me and I'm beyond wanting to learn it I've decided. Have a great week!

Friday, October 7, 2016

Chambray Ansley Tunic with Embroidery


This is my third and final outfit for Elena for this fall. The tunic is a modified Ansley top from Blaverry Patterns. I lowered the neckline half an inch, added a tie-back belt, and put elastic in the sleeves instead of cuffs. I think I changed the hi/low length a little too making it as long as my fabric allowed for. I also lined the bodice pieces so that the embroidery wouldn't be exposed on the back and against her skin. 


The fabric is a speckled chambray from the Imagine Gnats shop. It was great to work with. I would definitely use this again. Rachel is having a meet and greet event at her shop tomorrow that I'd love to go to. I have to drive an hour south of home tomorrow for a swimming meet but I'll still be 3 hours north of her so I guess I won't make it this time.


 The embroidery is my own design. I was pretty proud of myself for not spending hours and hours trying to decide what to do. I just went with the first thought I had and then added on. Very organic. Just letting it happen. (Very unlike the top I've been trying to design for myself and can't decide on.)
And looking at that picture reminds me that I also changed the button placket and hid my buttons on the backside. That was because the bodice felt too wide and this way my embroidery design wouldn't be interrupted.


So I have to also mention the "banana pants" as Elena calls them. She is not fond of them, but I hope they grow on her because they are pretty awesome. The fabric is mustard stretch corduroy from CaliFabrics. The pattern is the LouBee Clothing Hosh pants. Size 3 width, 5 length. No other changes. Plain and simple and oh so soft.


Poor kid really hates this blogging business.


Wednesday, October 5, 2016

Plaid "Poncho" Not a Poncho


I'm back to sewing for me and it feels great! I'm actually wearing all me-made here. The jeans were made last year and can be seen here. Today, I want to show you my new poncho- not a poncho, and a Plaintain T, modified. 


Poncho's are comfy and awesome, buuuuuuuut- sometimes not that useful. I have a gorgeous, wool, hand-knit (not by me yet) poncho that I love. Trouble is that it is hard to throw a bag over your shoulder and go grocery shopping in a poncho. Put the bag under the poncho and you'll look like a shoplifter. Sometimes I wear it in the house, like a sweater, but then I can't lift my arms over my head or stir a pot at the stove so well. My solution was to make an over-sized dolman T out of a thick flannel fabric I bought at Joann's a couple of years ago. It is very thick and brushed and cozy - and on trend. 


After cutting my front and back pieces, which were identical, I serged all the edges first thing. I used my regular machine to sew them together and pressed the seams open. I did it this way to reduce bulk. I added patch pockets to the front. The sleeves and bottom are turned just once and hemmed since I serged first. Turning twice would have again been very thick.


The neckline is finished with a repurposed tank top of wide-rib knit. I cut the hem off the tank and cut it off under the armpits. It is folded in half and serged on, then top-stitched. This rib knit is super stretchy so I made the circumference 75% of the neck opening. The top of the cowl (where it is folded over) is much narrower, about 14" only. It was an experiment that went very well. I really get a kick out of this kind of experimental sewing. As long as you only use a basting stitch first, you can try anything and know that it can be removed easily. Then make it permanent if you like it, or re-adjust and try again.

The t-shirt is a Deer & Doe Plantain Tee with a higher neckline and one inch added to the sleeve length. The fabric is super nice cotton lycra from Girl Charlee. The special part is on the wrists. These are as close to tattoos as I'll ever get. I found an olive branch image I liked and made 2 freezer paper stencils. I painted them on, placed an extra scrap of the same fabric behind it,  and then added backstitch outlines and cut out the olive shapes. I had planned on doing the whole thing reverse applique, but decided I liked it just cutting out the olives. 


This trail is my daughter Olivia's favorite place. I come hiking here once a week. It is just gorgeous. I want to include pictures of it in case she gets a chance to peek at the blog. You are in my thoughts always, Olivia.